Watercolor Easter Chick Tutorial
Learn how to paint a sweet spring baby chick in this easy and fun watercolor tutorial. Each step is broken down so you can easily follow along!
The exact supplies I used are not critical, but I've listed everything below. The main things to have available are some heavy cotton watercolor paper (I use Hahnemühle 300 gsm, 100% cotton), watercolor paint (either tube or pan), and a couple of brushes. Here’s the reference photo I’ve used.
Supplies I Used:
Watercolor paper (Hahnemühle 300 gsm, 100% cotton)
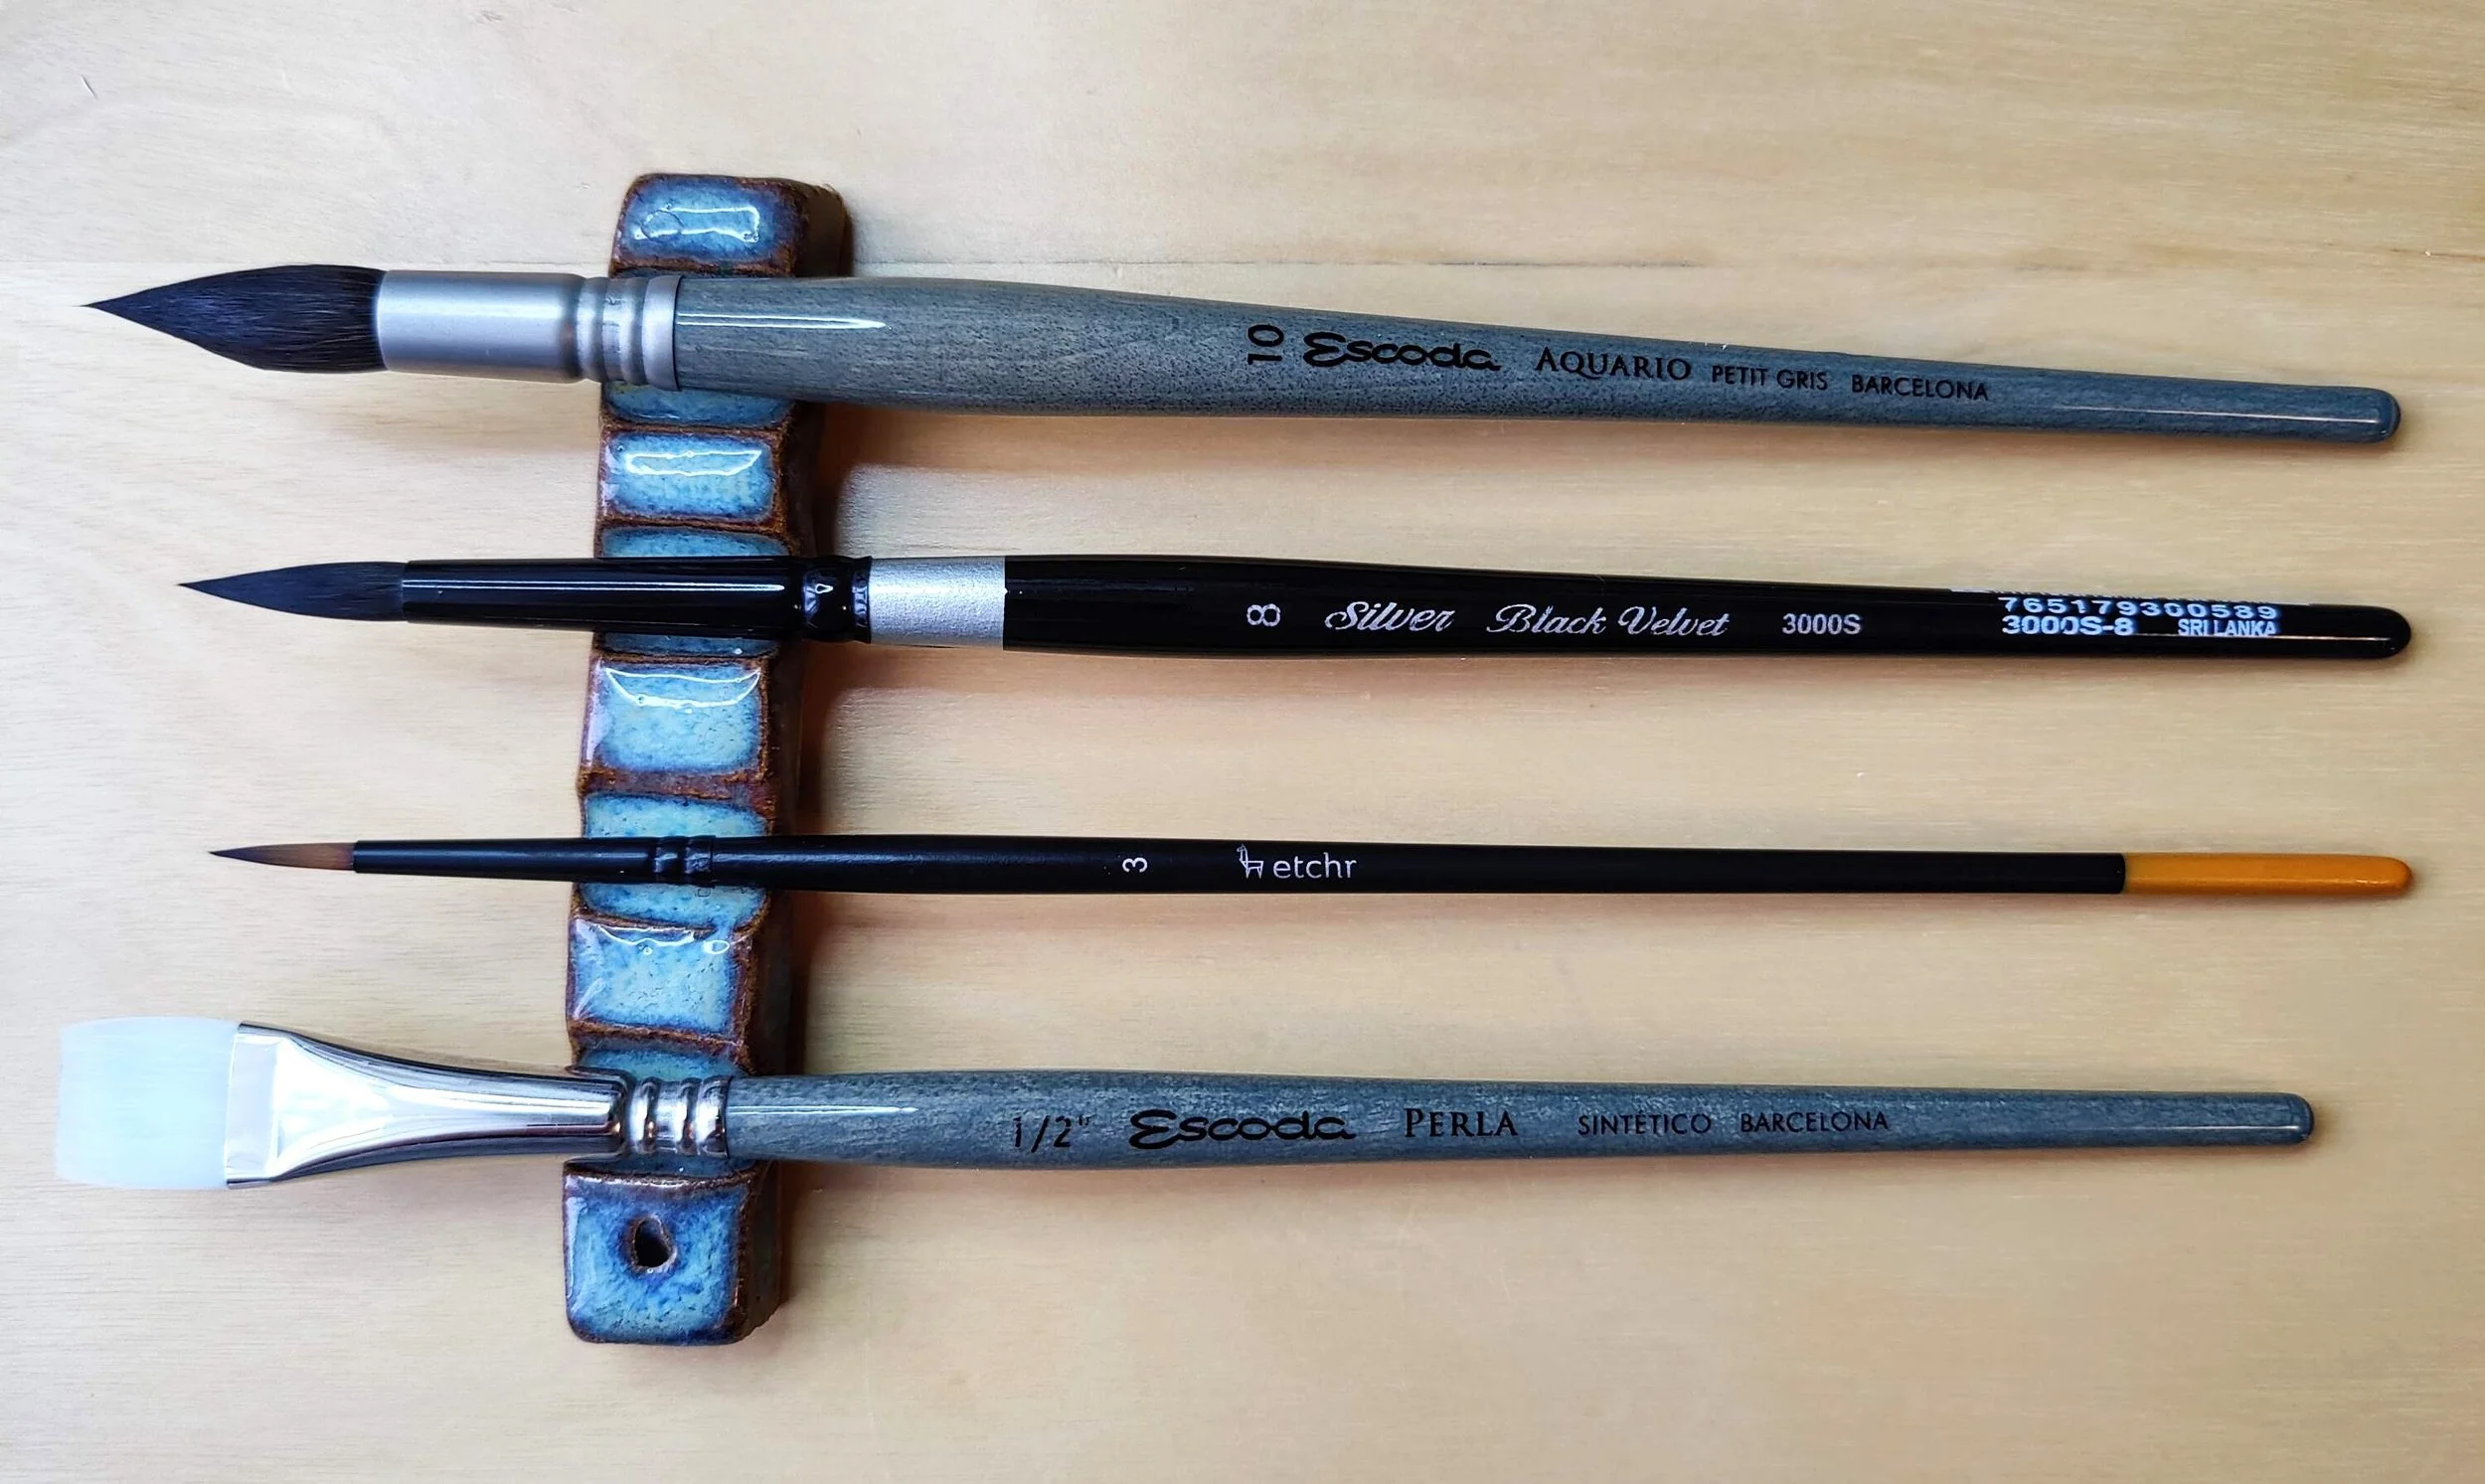
Watercolor brushes (a big one for wetting your paper, one medium round brush, one small brush for details, one flat brush for “erasing” the paint)
Watercolor palette (you can use a white ceramic plate)
Aureolin yellow (Mijello, Mission Gold)
Yellow ochre light (Mijello, Mission Gold)
Burnt sienna (Mijello, Mission Gold)
Vandyke brown (Schminke)
Payne’s gray (Daniel Smith)

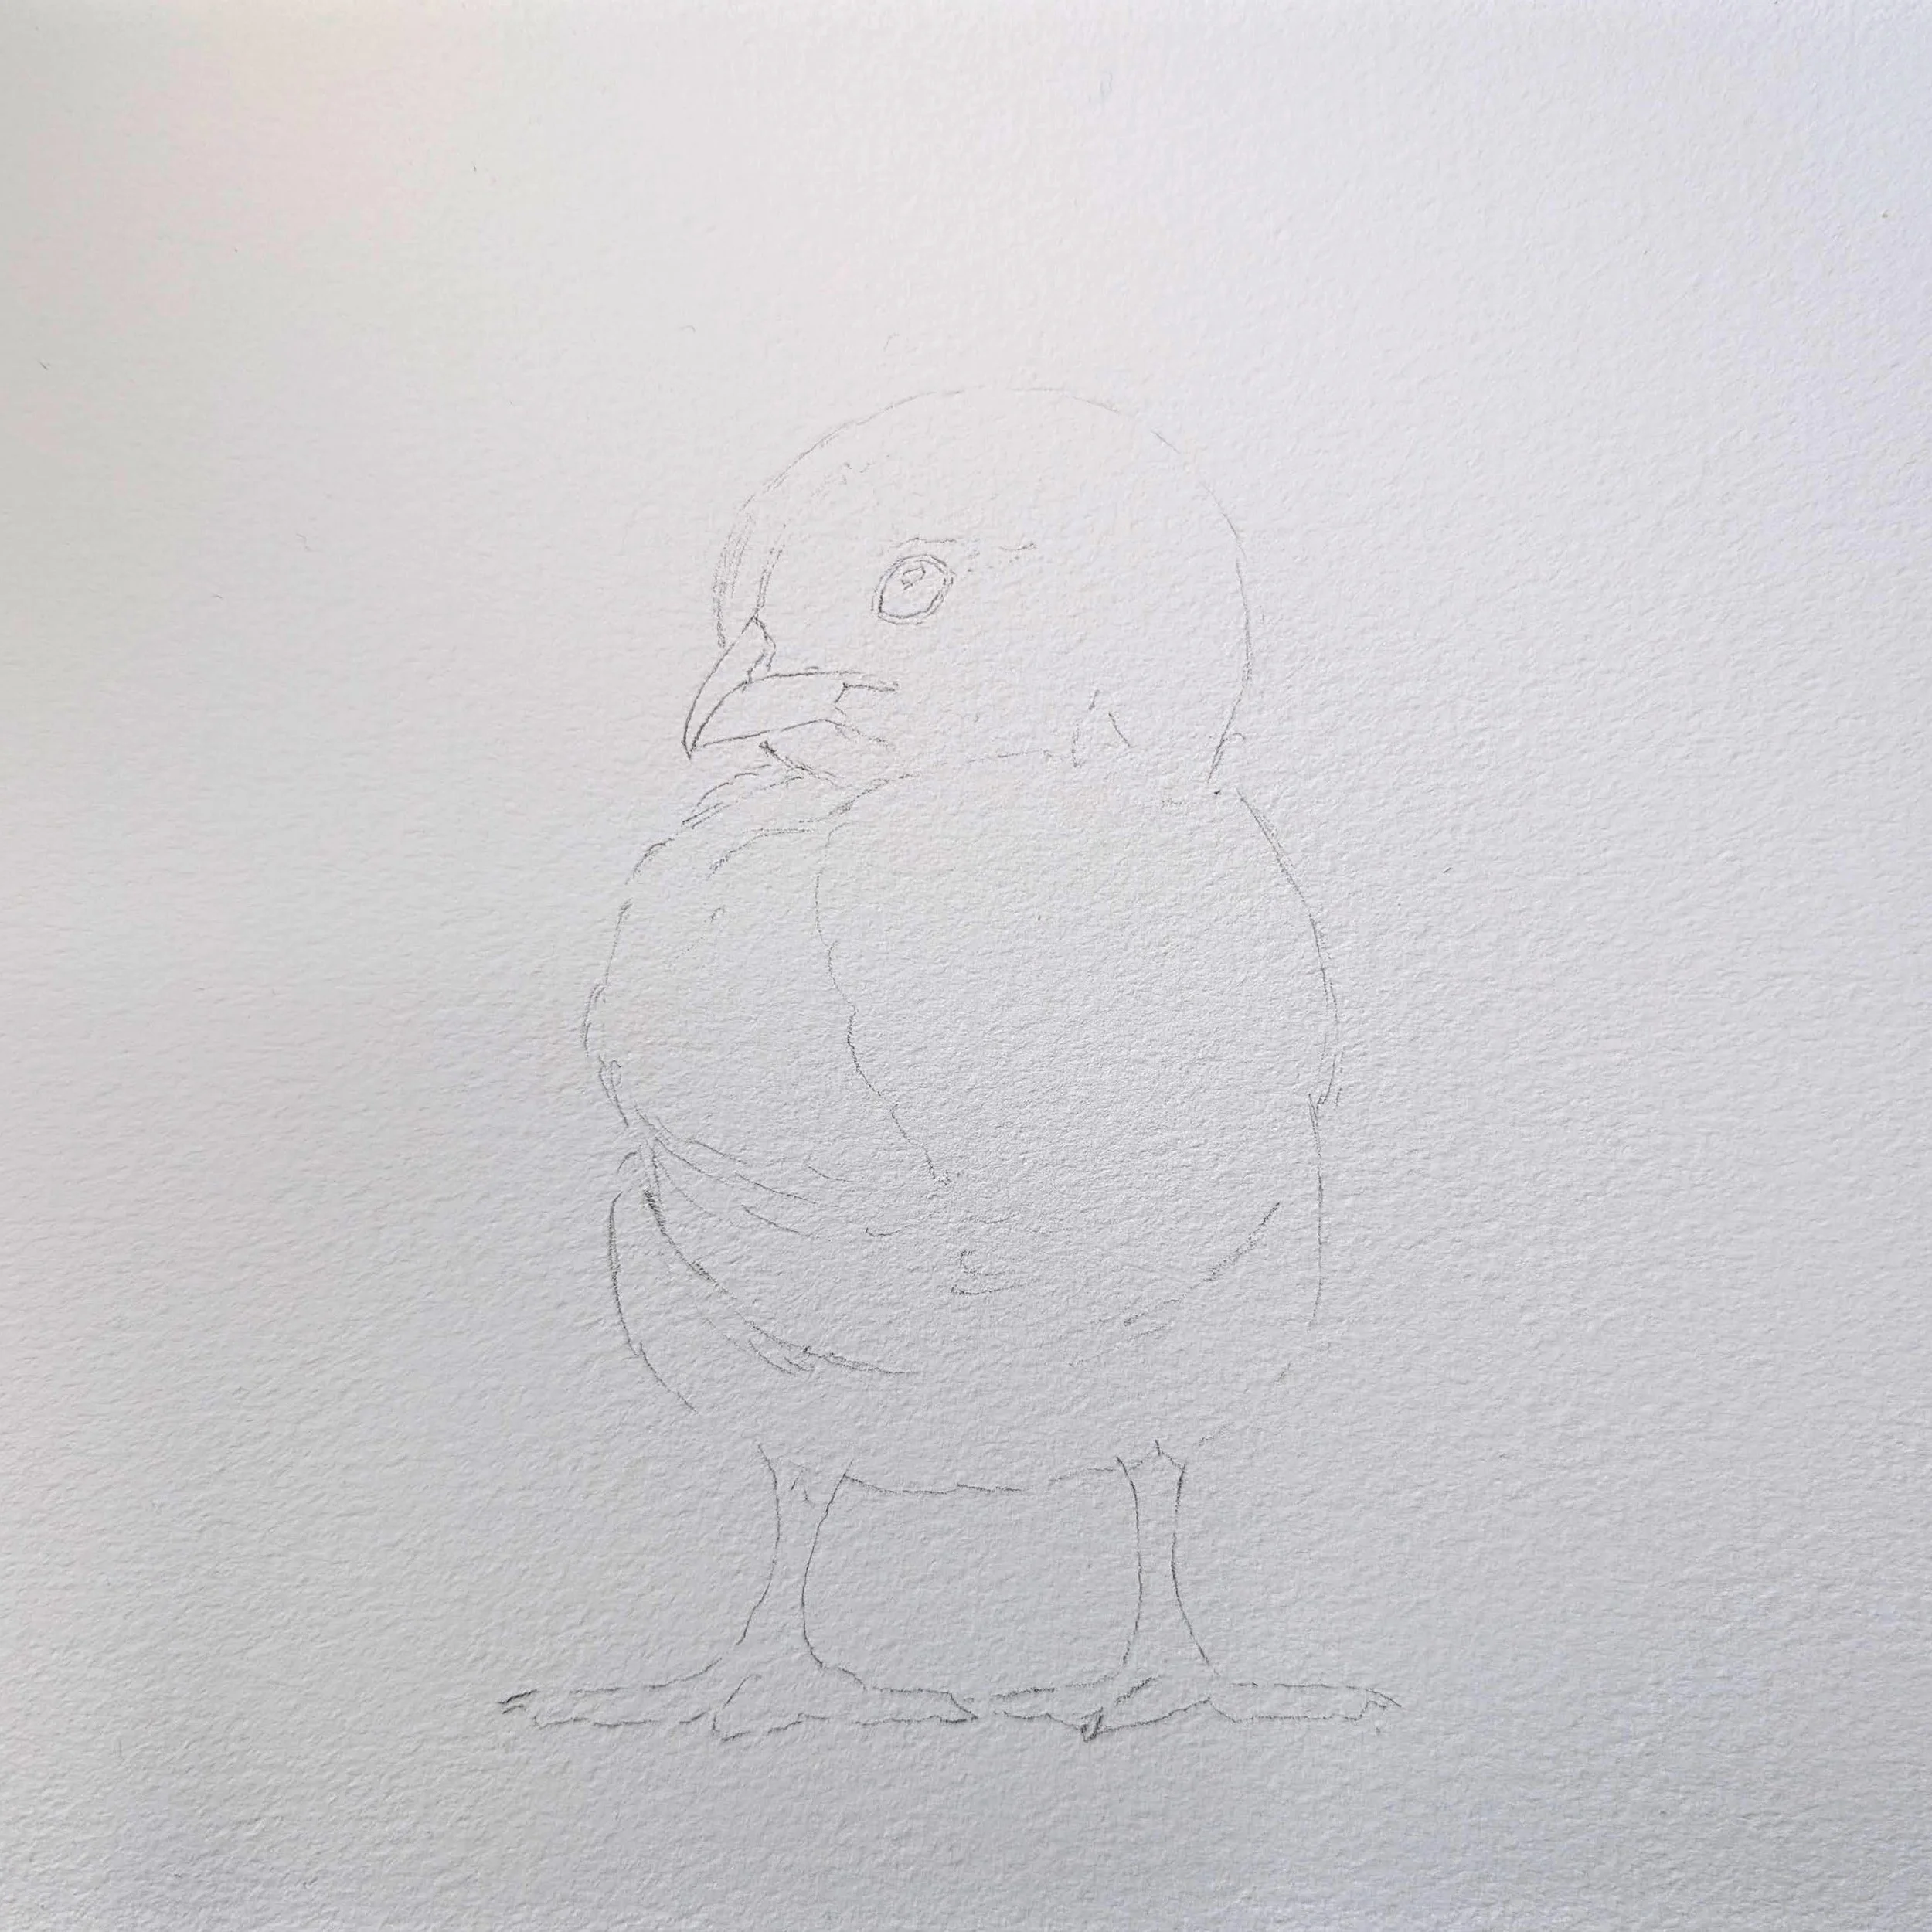
Step 1. Pencil sketch
First, I sketched the chick. Normally I would barely touch the paper with my pencil to make the lines almost invisible, because yellow watercolor is very light and transparent and we don’t want the lines to be visible through the delicate layer of paint. In this case however I went a bit harder on the pencil lines, because I wanted them to be visible on the photos. Keep that in mind and go lighter.
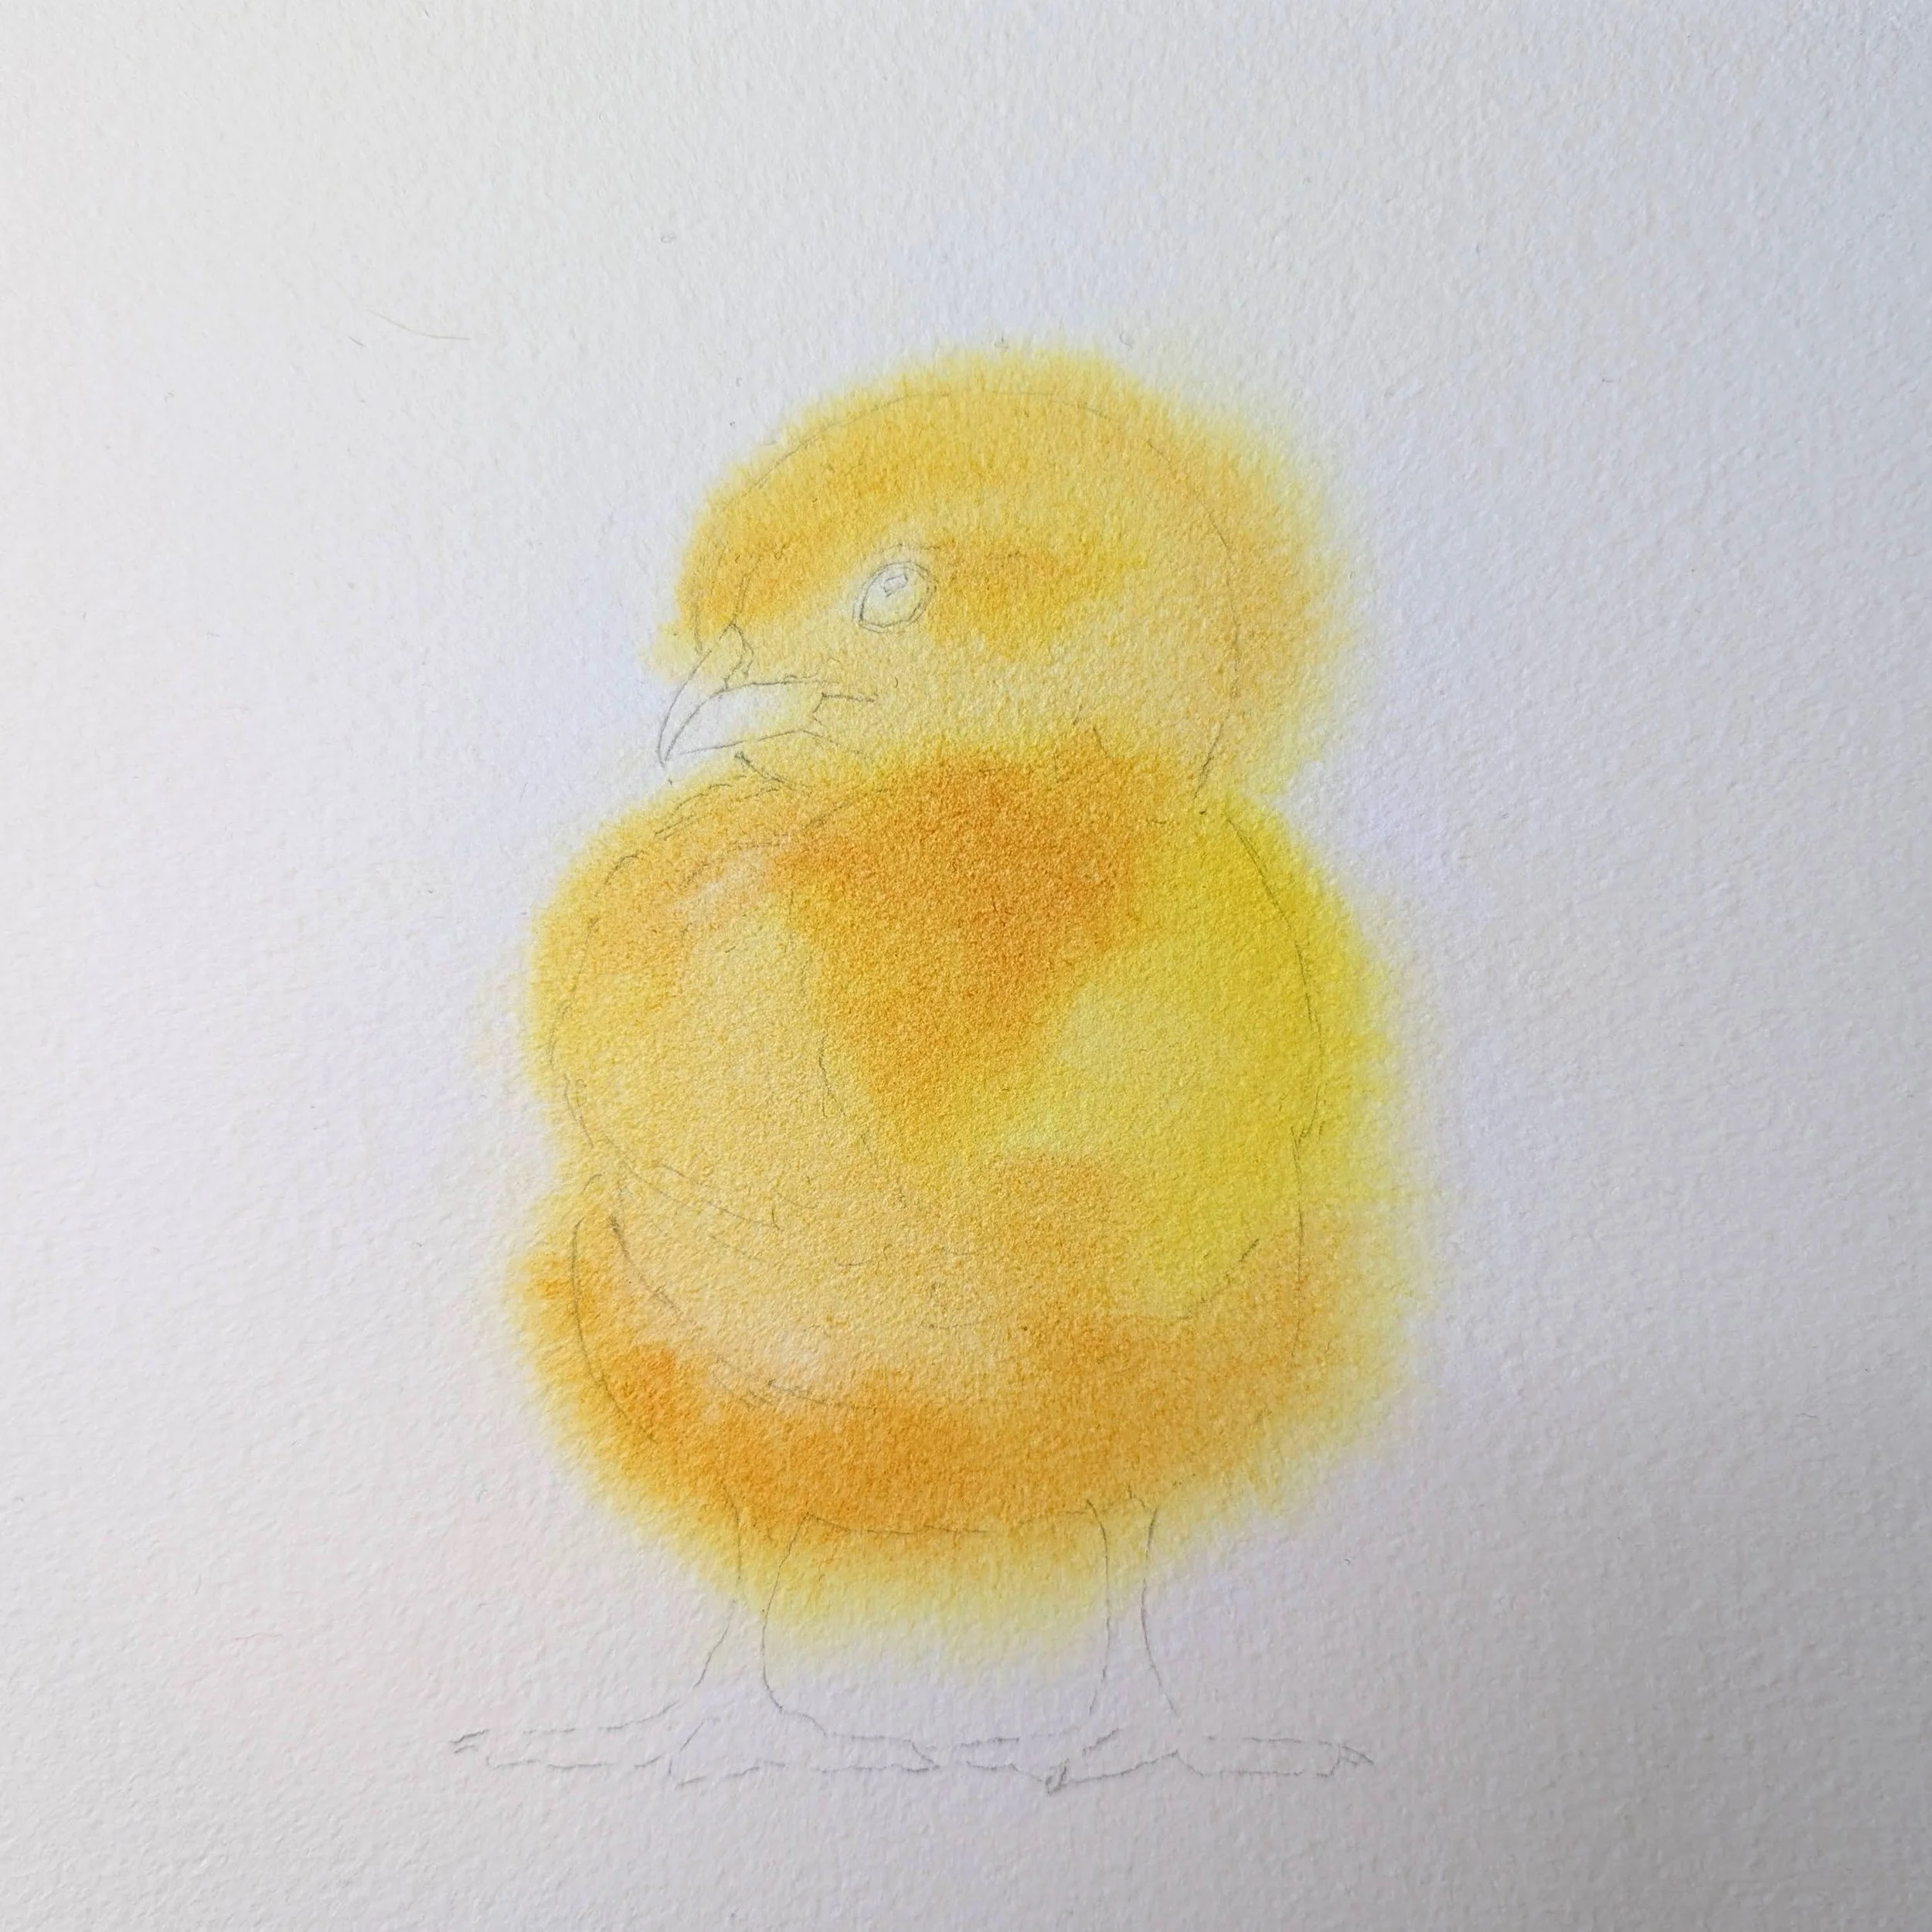
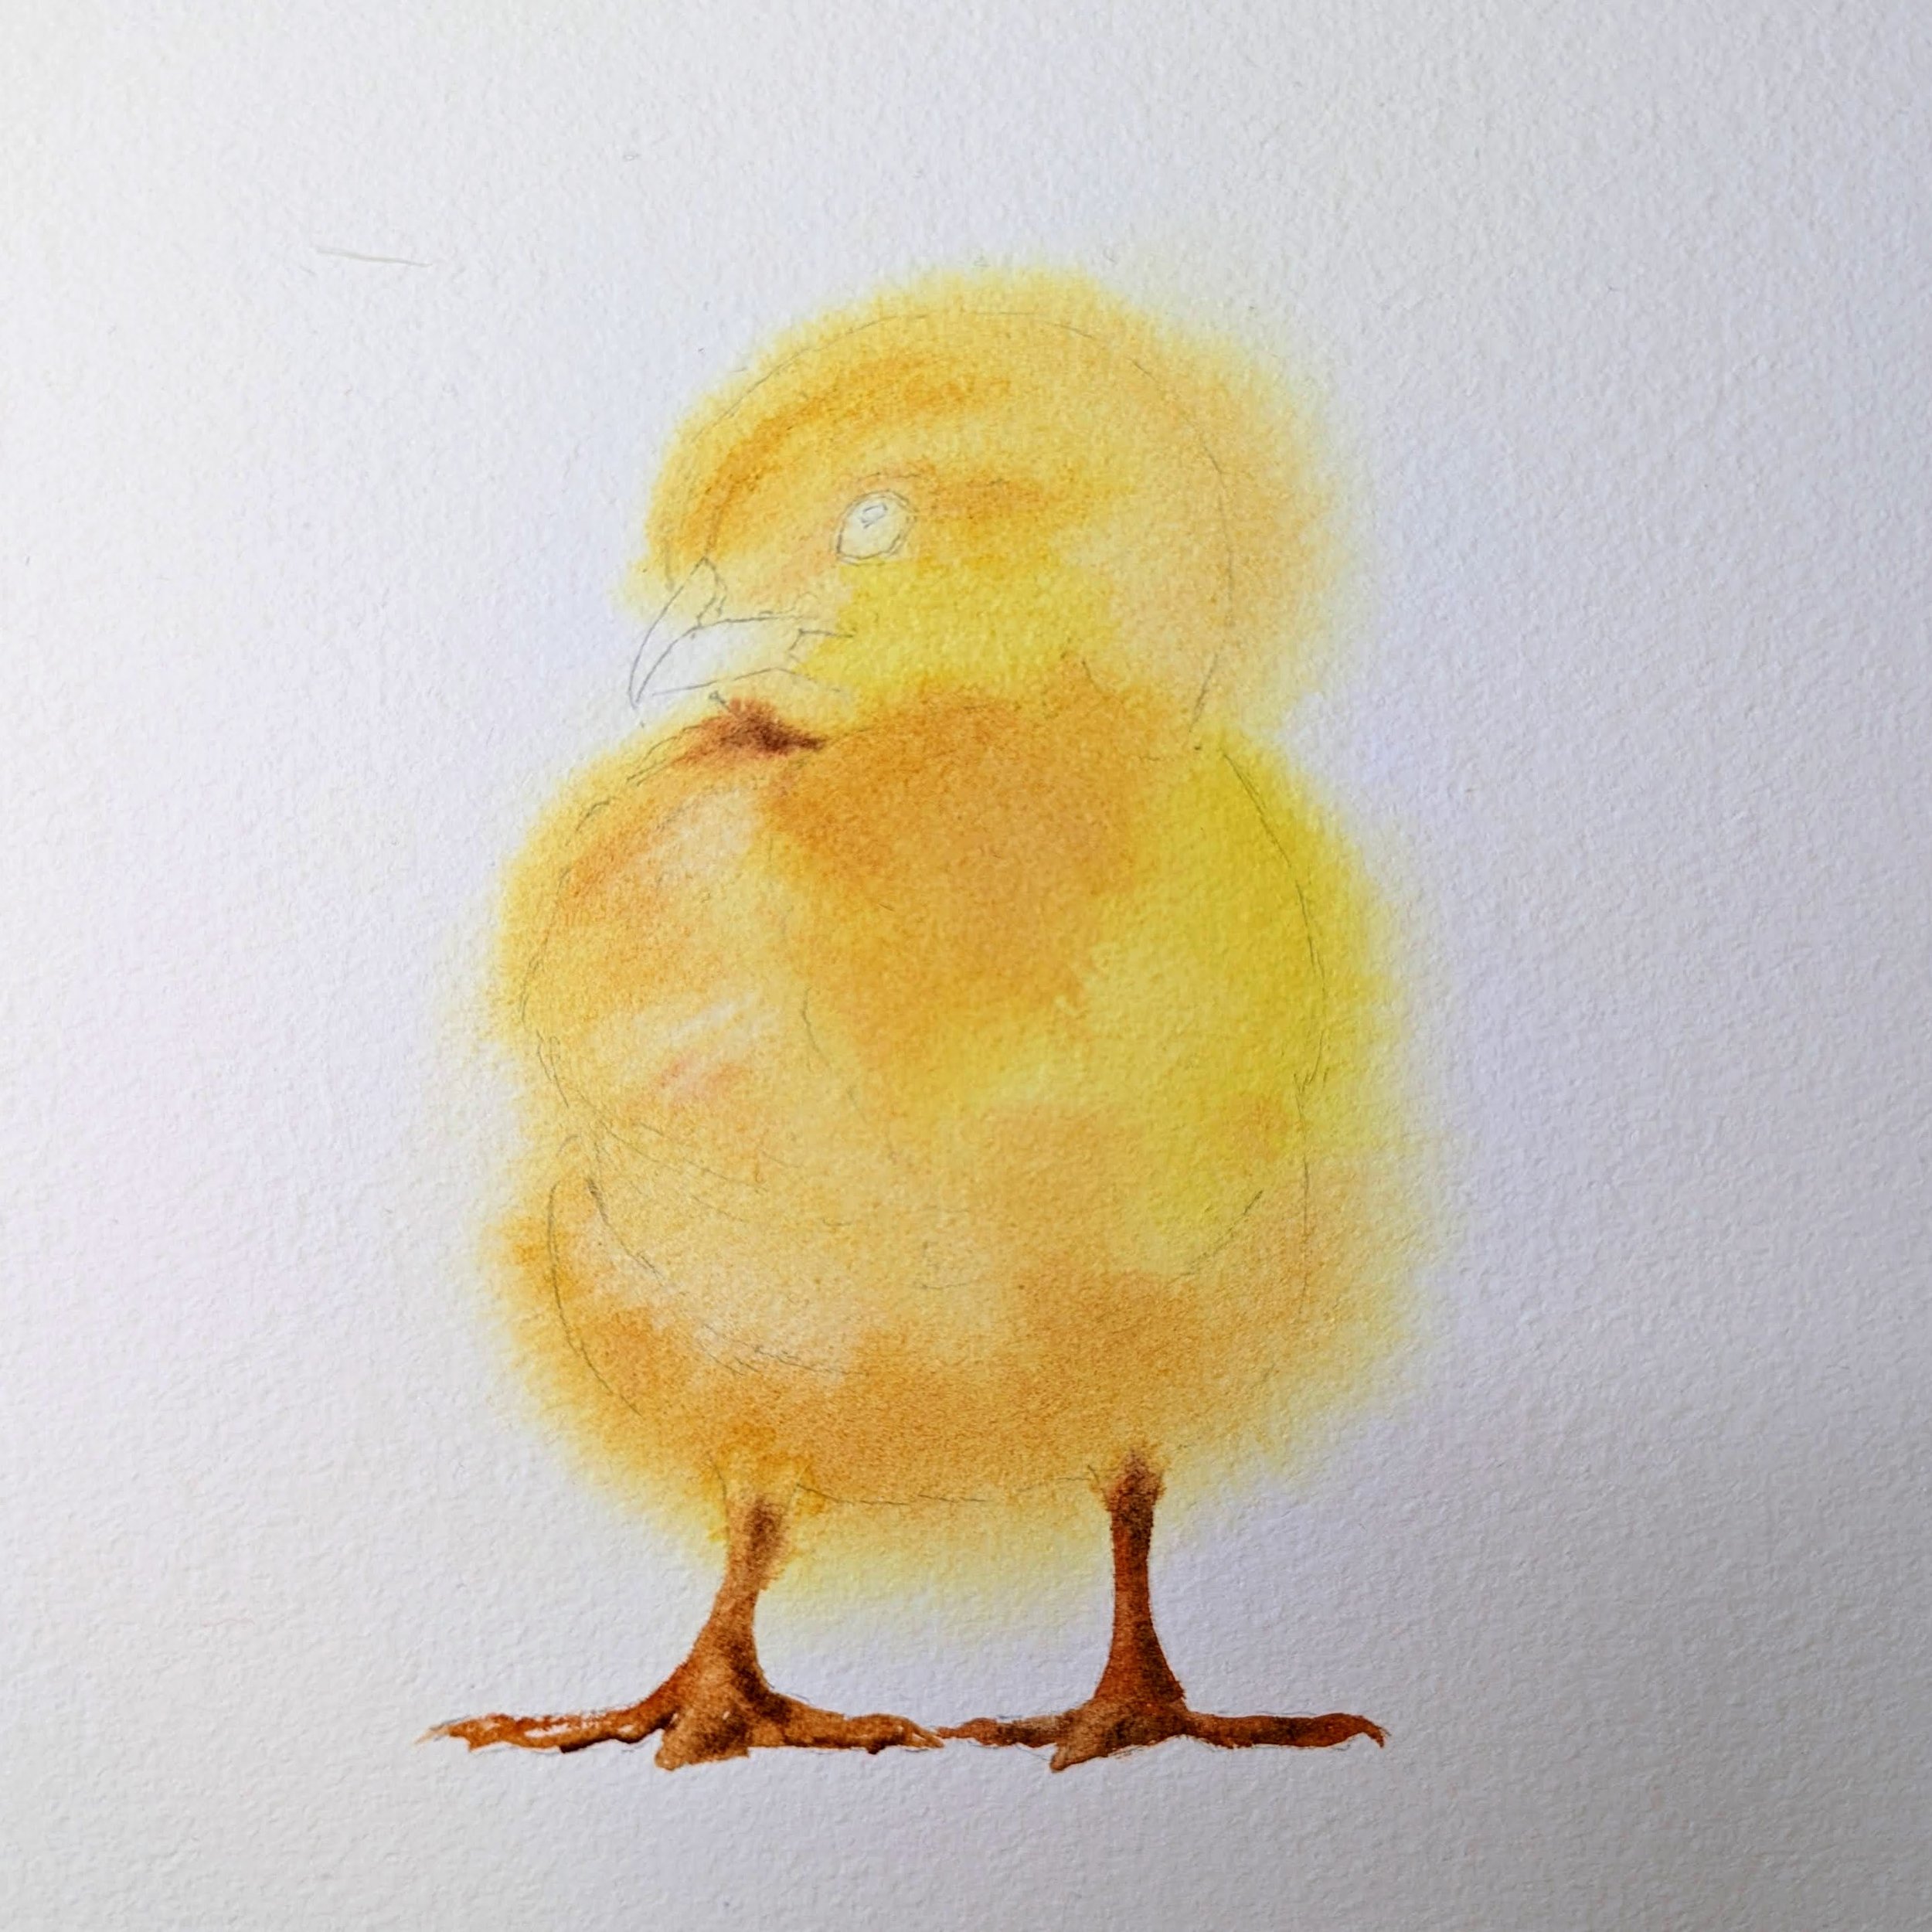
Step 2. First layer
Now I wet my paper thoroughly and let the water sink into the fibres of the paper. Then I start applying aureolin yellow on the lighter parts of the chick. For the mid tones I use the mix of aureolin yellow and yellow ochre and for the darker shadowy parts I mixed in some burnt sienna.
The idea is to do this all in one layer while the paper is still wet. That way all of the three colours will flow one into another, creating soft edges and diffused effect. And of course the fluffiness!
Step 3. Shadows and highlights
Now I need to deepen some of the darks with a drop of brown (shadow under the head) and emphasise some highlights. For this I always use my flat brush, wet it, absorb the excess of water with a paper towel (your brush should be damp, not wet) and then wipe the pigment off the paper where I need to see the highlights. The paper is still wet, so it’s very easy to remove the pigment.

Step 4. Feet
For feet I used burnt sienna and a little bit of brown for the shadows. I also used a bit of water to soften the edges of the parts where feet “meet” the body.
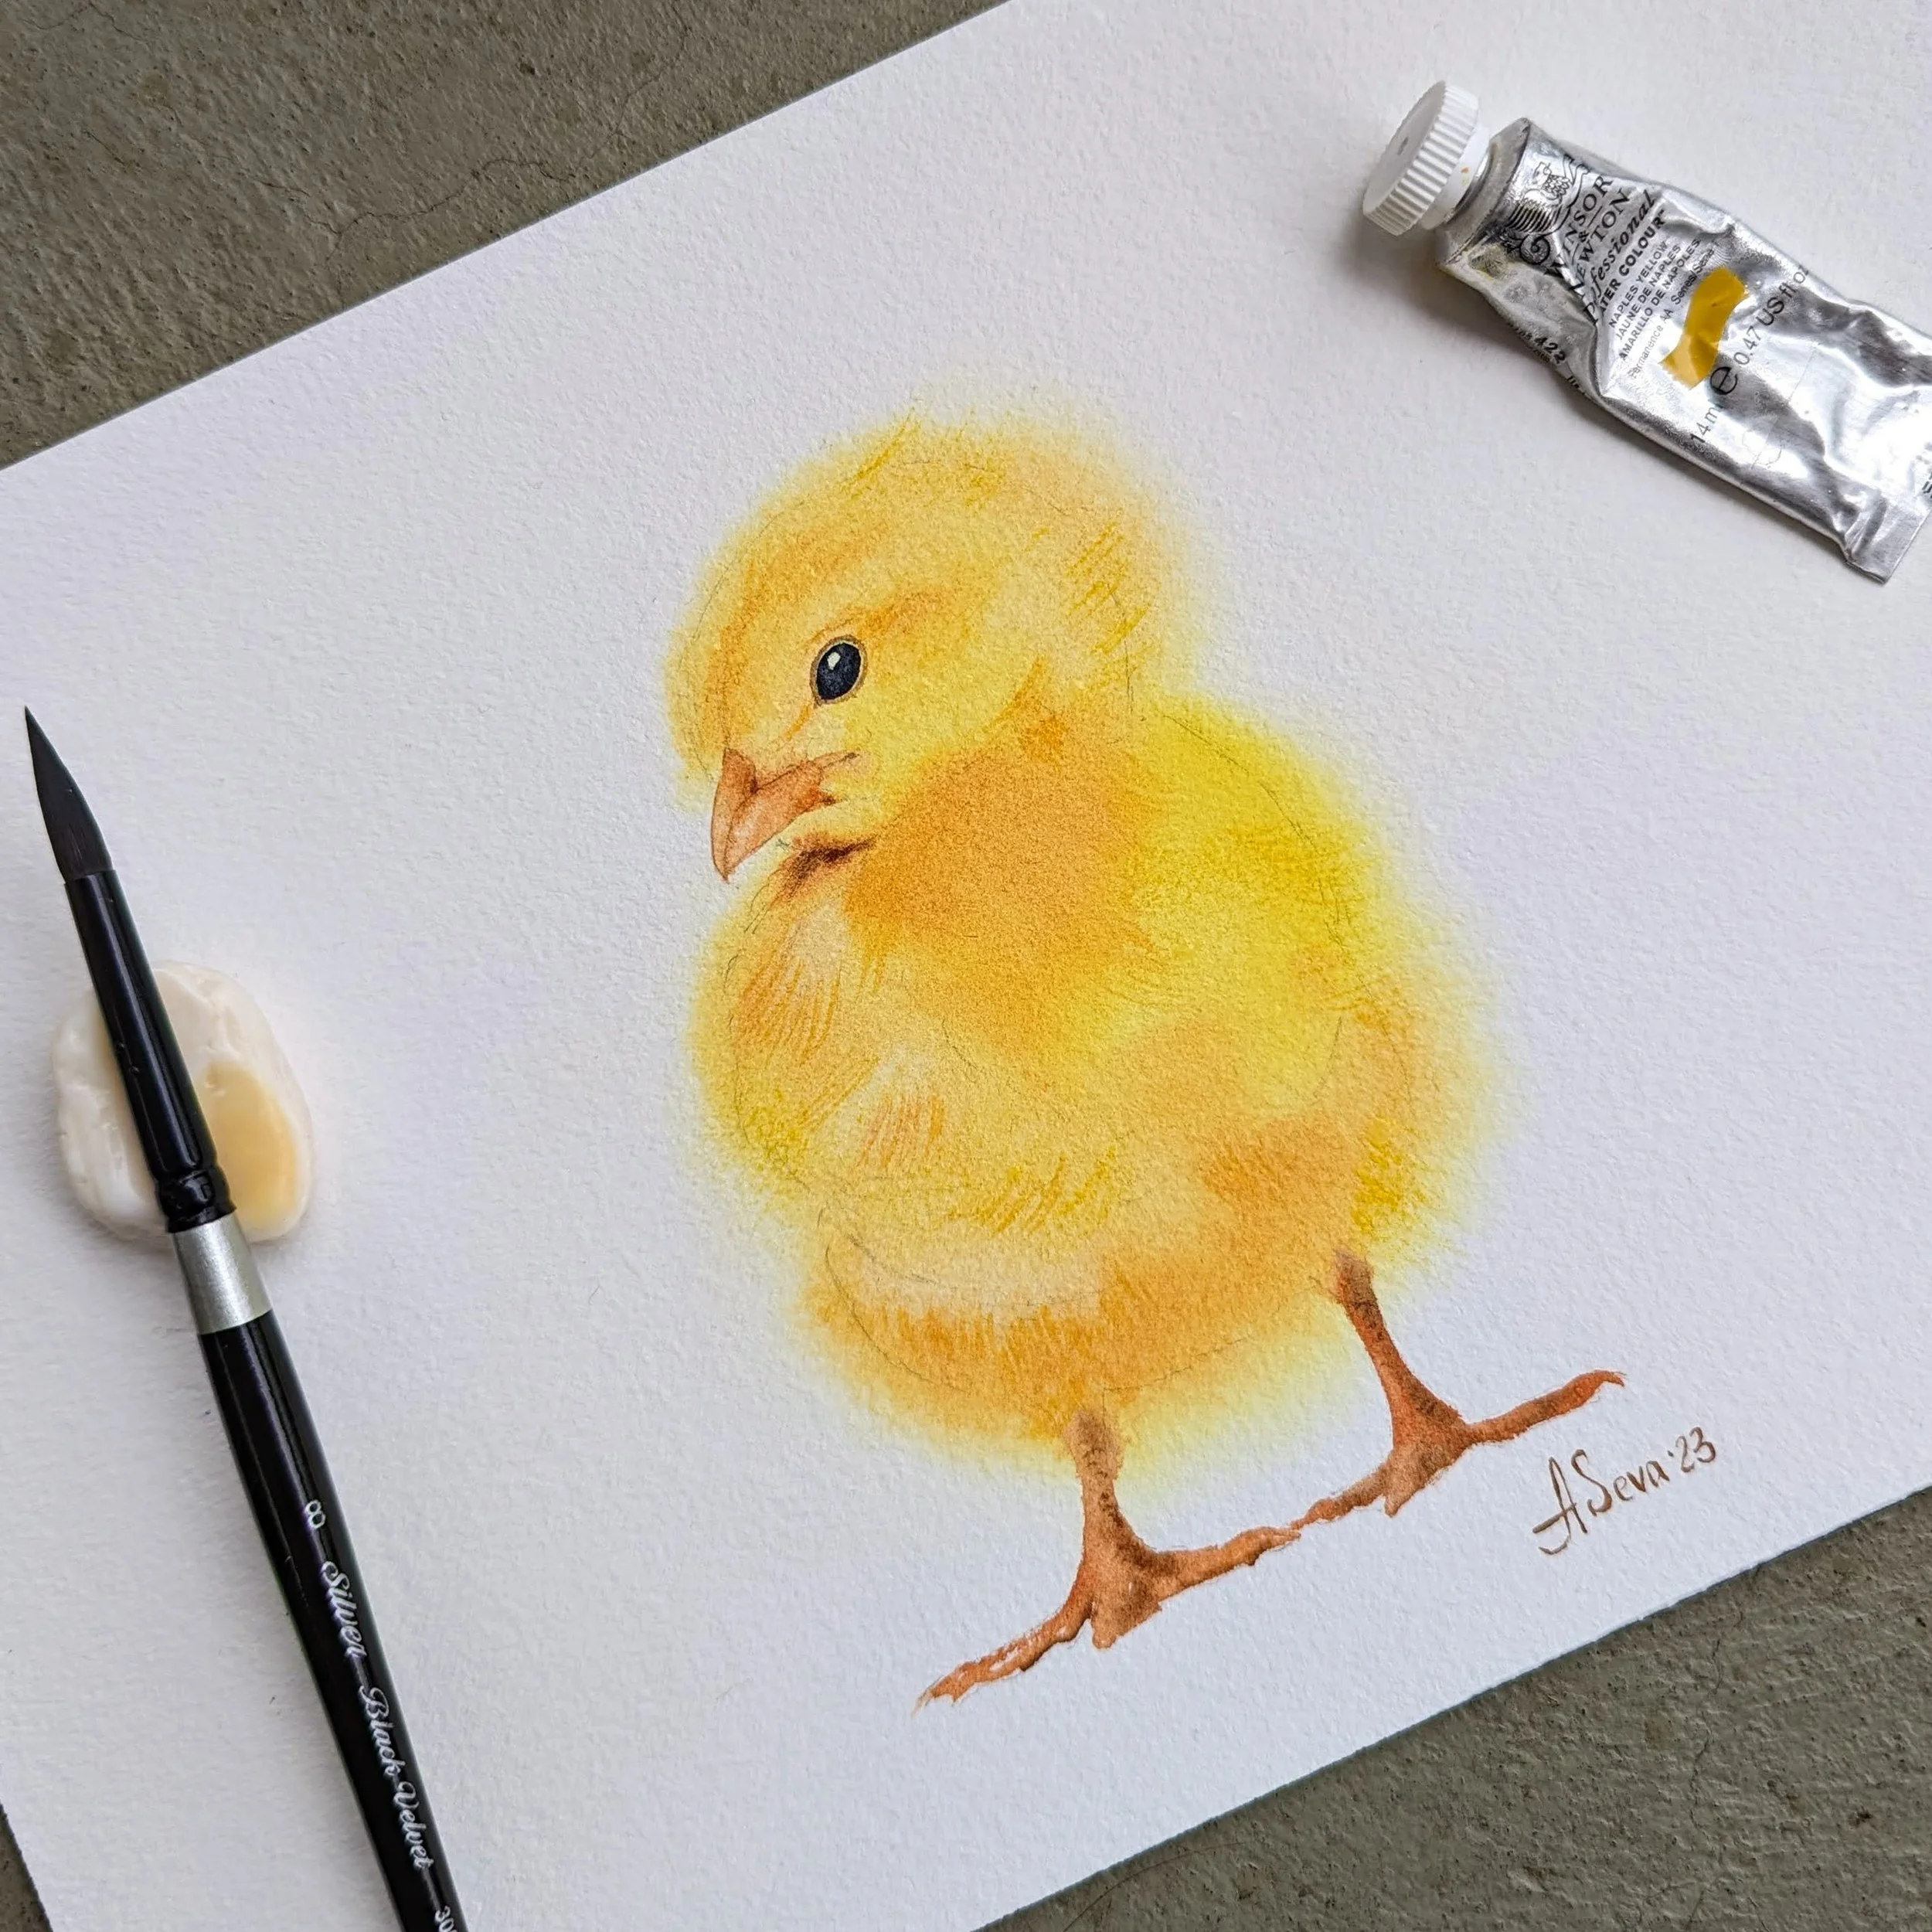
Step 5. Final details
Now to the final details: the eye, the beak and some feathers!
I used my smallest brush and yellow ochre with a touch of burnt sienna for the beak. For the eye I applied payne’s gray. Be sure to leave a little white area inside the eye as a bright spot when you're filling it in. I also used some brown to outline the eye for the the eyelid.
Next, with the small dry brush and a darker mix of yellows I painted some of the individual feathers.
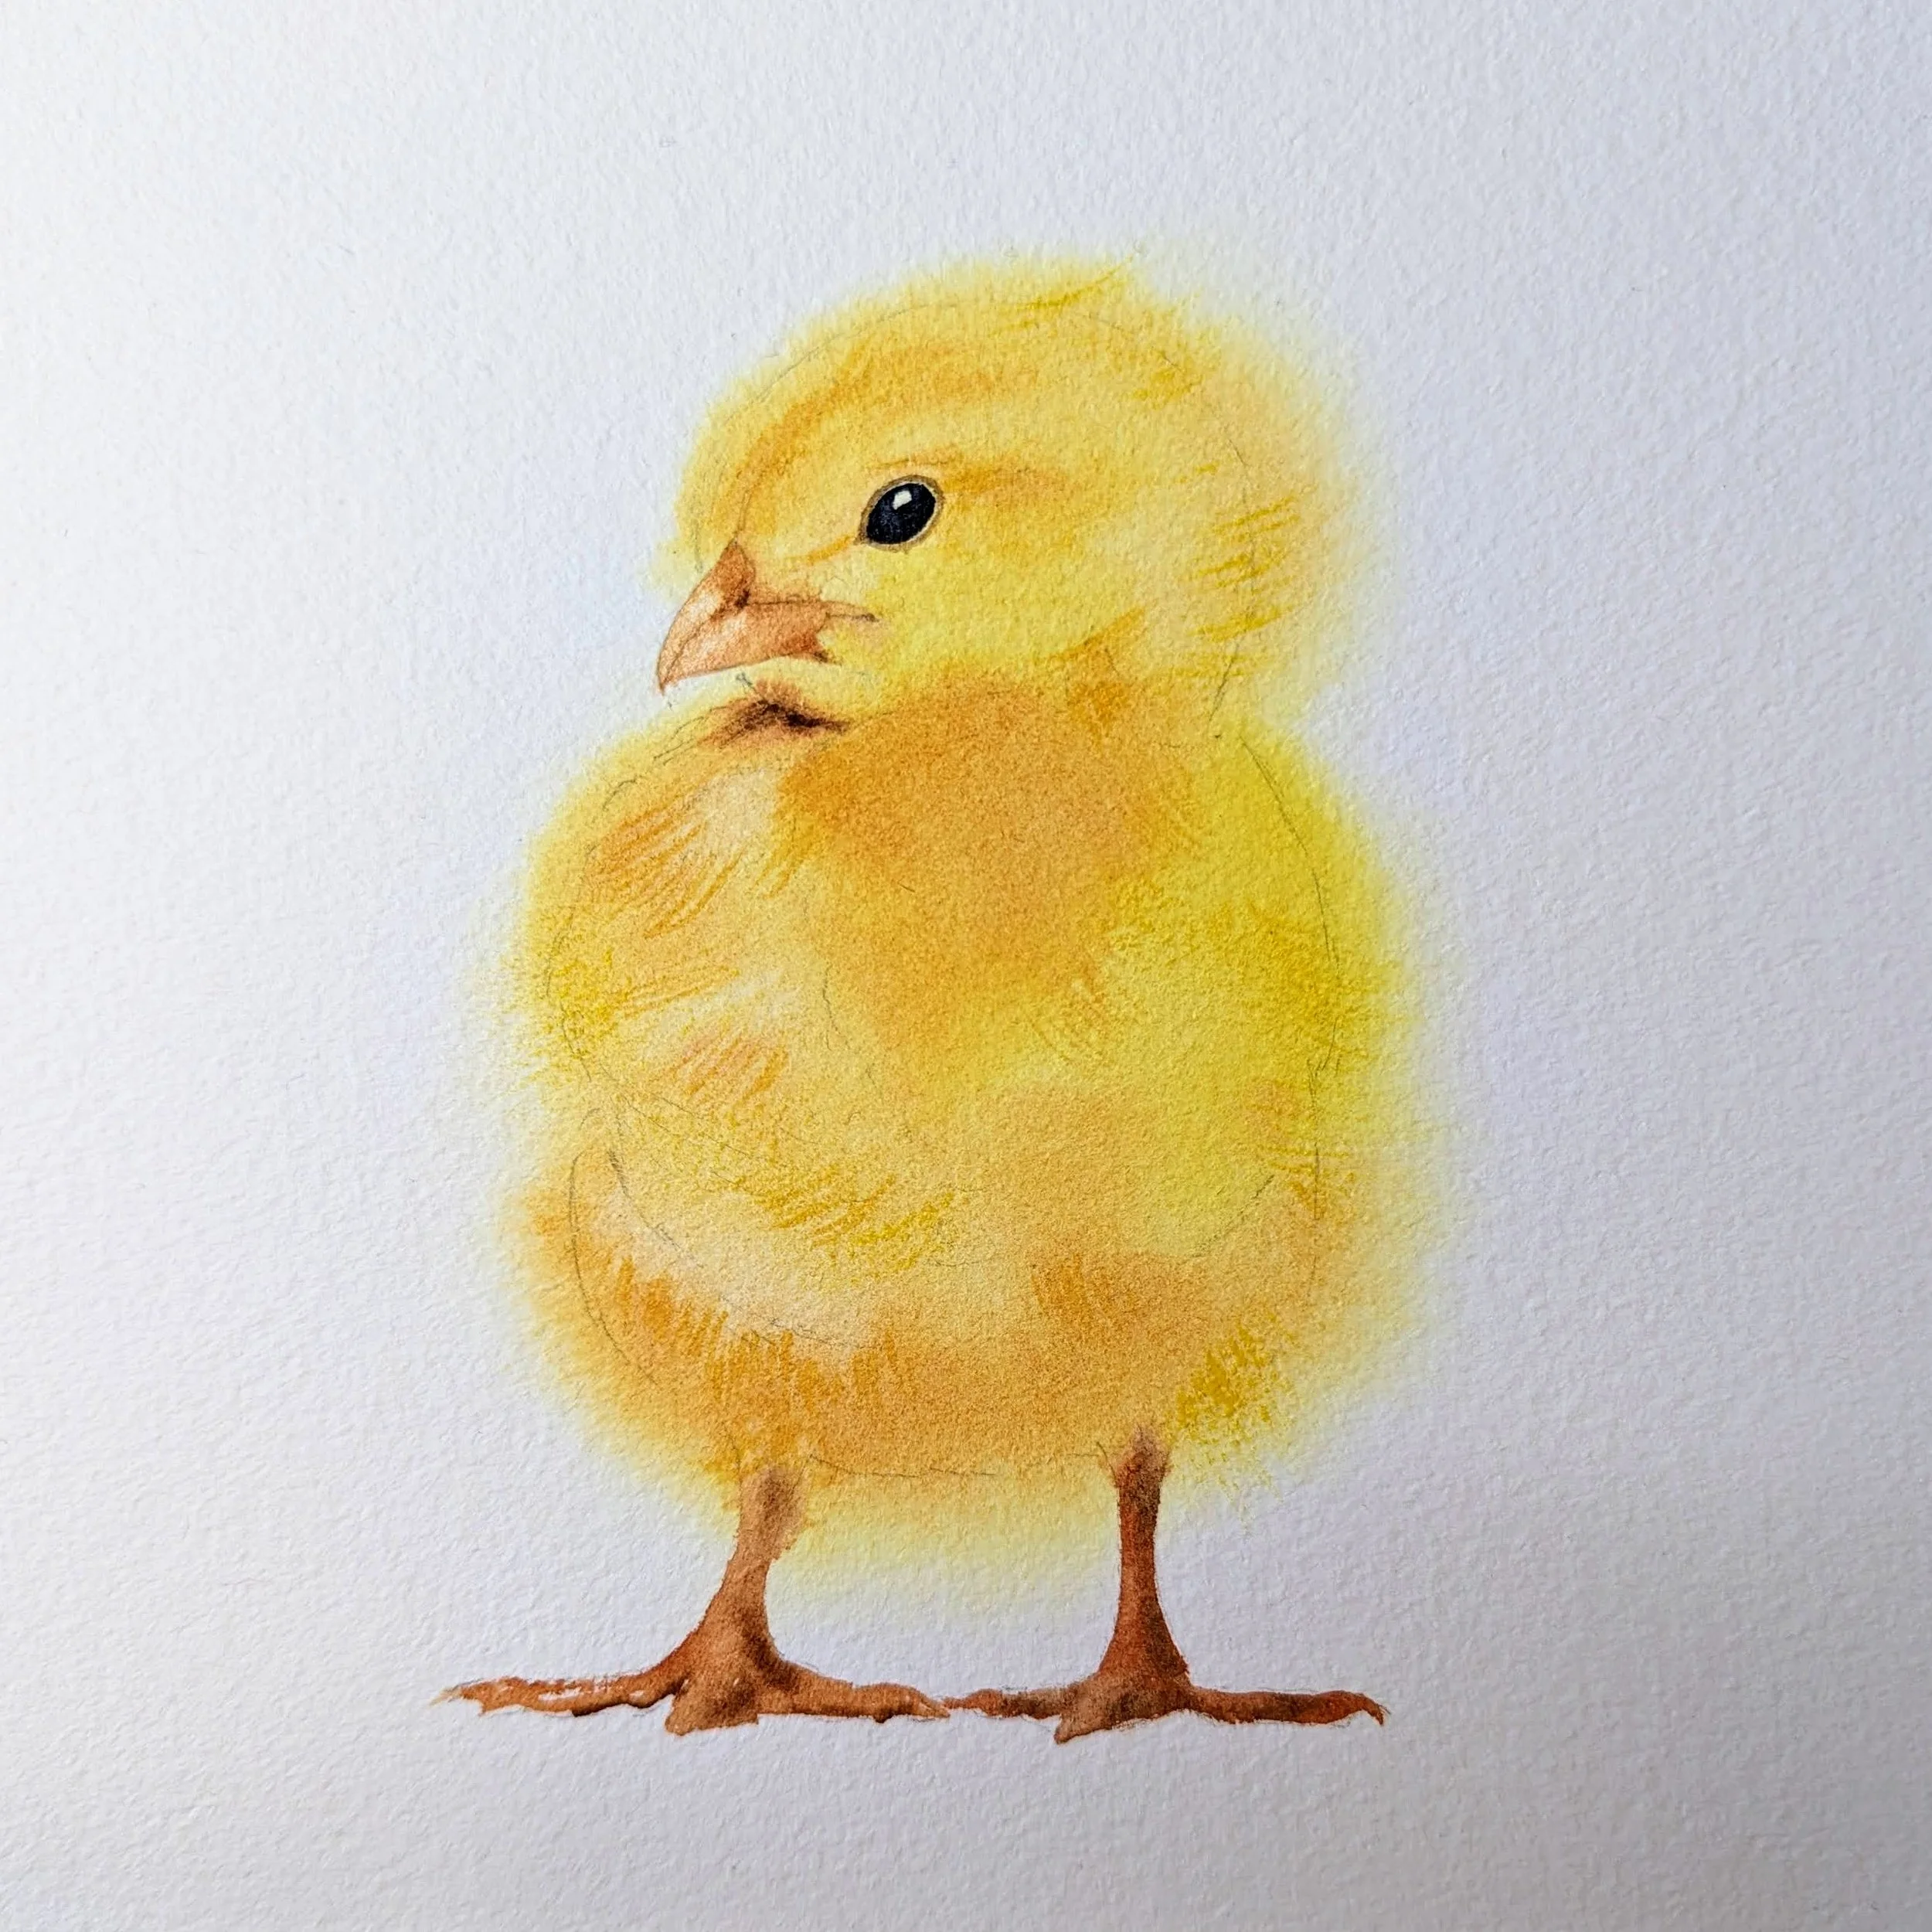
And voila! We are done!
I hope you enjoyed this quick and fun tutorial.
If you're interested in learning watercolor more seriously, I regularly offer private in-person watercolor workshops in my home studio in Adliswil or group watercolor workshops in Zürich. Subscribe to my newsletter and Instagram to get the announcements!
Here you can find a slightly sped up video of the whole process. Enjoy!