Winter Evergreen Tree Watercolor Tutorial
Welcome to this step-by-step watercolor tutorial where we'll explore the process of painting a snow covered evergreen tree.
It can be a great idea for your hand made holiday card or a simple minimalistic painting on its own.

Supplies I Used:
The exact supplies I used are not critical, but I've listed everything here:
I have a scrap of 100% cotton paper (11 cm x 16 cm);
watercolor paints. Colors I used: White Nights Taiga Mist (for the tree), White Nights Sky-Blue Shadows (for snow), red and black (for a bird);
round brush medium size and a small one for details;
white gouache.
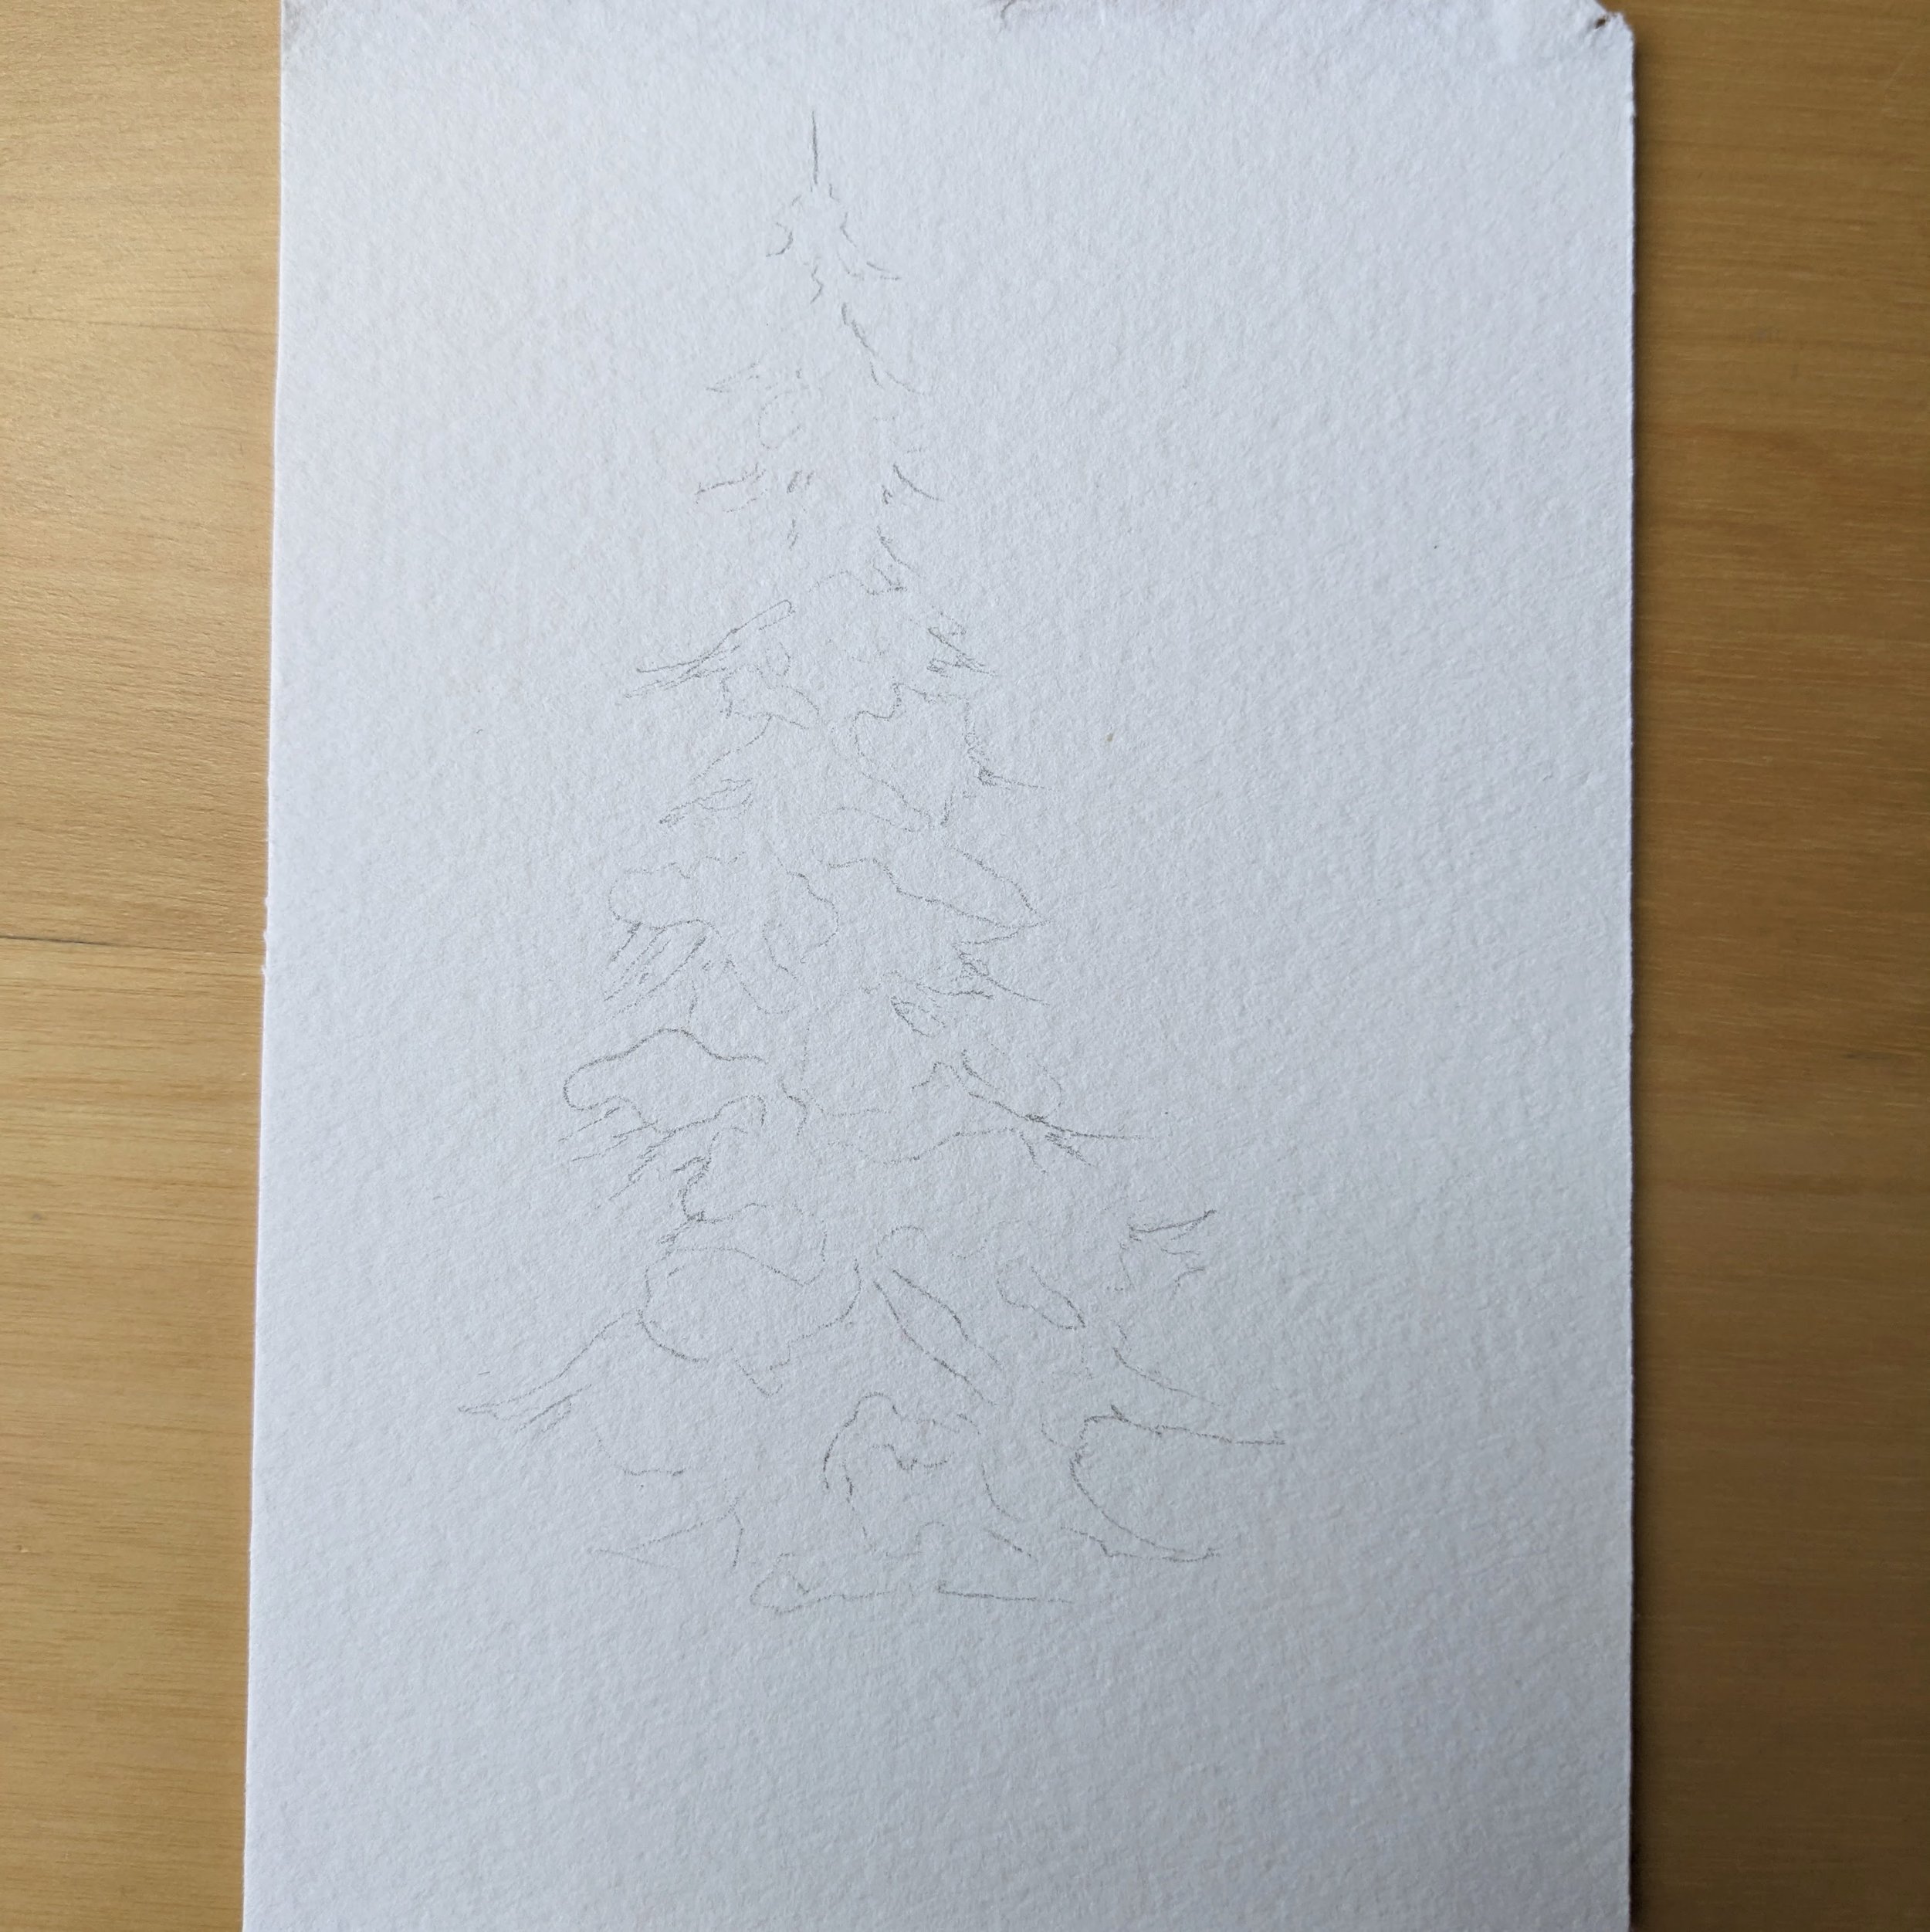
First, start with a light pencil sketch, putting the emphasis on the shapes of snow on the branches. These shapes will guide you to leave them white while painting the green branches around.
Now it’s time to paint the branches. For heavy snow, there will be less visible green, and for a lighter coating, more of the branches will show. Paint around the clumps of snow, leaving them white.
Use a dark green or mix your own by adding blue to your green for the branches.
Apply a light wash of blue to the foreground snow, merging the lower branches with the snow. Keep the background white for a minimalistic style.
Use diluted blue to paint shadows on the clumps of snow on the branches to add dimension.
Although I wanted to paint a very minimalistic card, when I was done with the tree I felt like something was still missing. So I added a bright accent - the red cardinal bird! Keep it simple, highlighting the red shape with a few black details on the wings, tail and head.
Finish by splashing white gouache for a snowy effect. You're done!
Below, you'll find images documenting some steps of the process, allowing you to follow along visually. Additionally, enjoy a sped-up video capturing the creation of this winter card. Happy painting!